 This was the first time I lined the hood, and I like it a lot better that way. I left the bottom edge raw with just a couple parallel lines of stitching. The hood binding and the flannel pocket both have "rag" edging detail. The plaid shirt I used had an interesting label on the inside, so I utilized that as a patch embellishment on one sleeve. All in all, I'm pretty pleased with it and my boy loves it so I call this one a complete success!
Upcycled Hoodie
This week I made my third hoodie from the Lil Blue Boo pattern, a size 5 for my seven year old. I think this is my best one yet, I'm feeling more confident with this pattern. This hoodie was made from thrifted items and inspired by a hoodie I saw at a trendy kid's boutique online.
 This was the first time I lined the hood, and I like it a lot better that way. I left the bottom edge raw with just a couple parallel lines of stitching. The hood binding and the flannel pocket both have "rag" edging detail. The plaid shirt I used had an interesting label on the inside, so I utilized that as a patch embellishment on one sleeve. All in all, I'm pretty pleased with it and my boy loves it so I call this one a complete success!
This was the first time I lined the hood, and I like it a lot better that way. I left the bottom edge raw with just a couple parallel lines of stitching. The hood binding and the flannel pocket both have "rag" edging detail. The plaid shirt I used had an interesting label on the inside, so I utilized that as a patch embellishment on one sleeve. All in all, I'm pretty pleased with it and my boy loves it so I call this one a complete success!


Boo to you, too


A simple Halloween banner for your door or window. Easy to do, probably doesn't need a detailed tutorial but I thought I'd post some pics and description of the process just to get you started. :)
For the impatient, here's a quick summary: cut paper, draw letters, paint, glue, voila.
First choose your word for the banner - the word will determine the length of the banner. Choose a Halloween - ish font. I printed our letters out at about a size 500 font - the exact number isn't critical, just enlarge the font enough that each letter fills one page.

For the main part of the banner, I used some kraft paper packaging that came in an Amazon box the other day. It was already pretty wrinkled, so I decided to go with that. I tore off a piece about 1' wide by 3' long. I wrinkled it all up really tightly then spread it back out and with a dry iron on cotton setting, pressed it flat. It was rather fun to be ironing wrinkles into something for a change! Probably that isn't a recommend use of my iron. Certainly I risked burning down the house if one of my delightful offspring started bleeding or puking and distracted me - I am sure you can figure out your own nice, safe way to flatten wrinkled paper. ;)
Trace the letters onto the banner, fill in using marker or whatever you prefer. I contemplated creating a stencil but decided against spending the time on that and just scribbled it in with one of the kids' markers.
Once the main banner piece was pressed and lettered, I tore off another section of kraft paper the same width and about 8" long. I painted it with a tempera paint that I had thinned with water, I wanted a stained look rather than a matte coating.
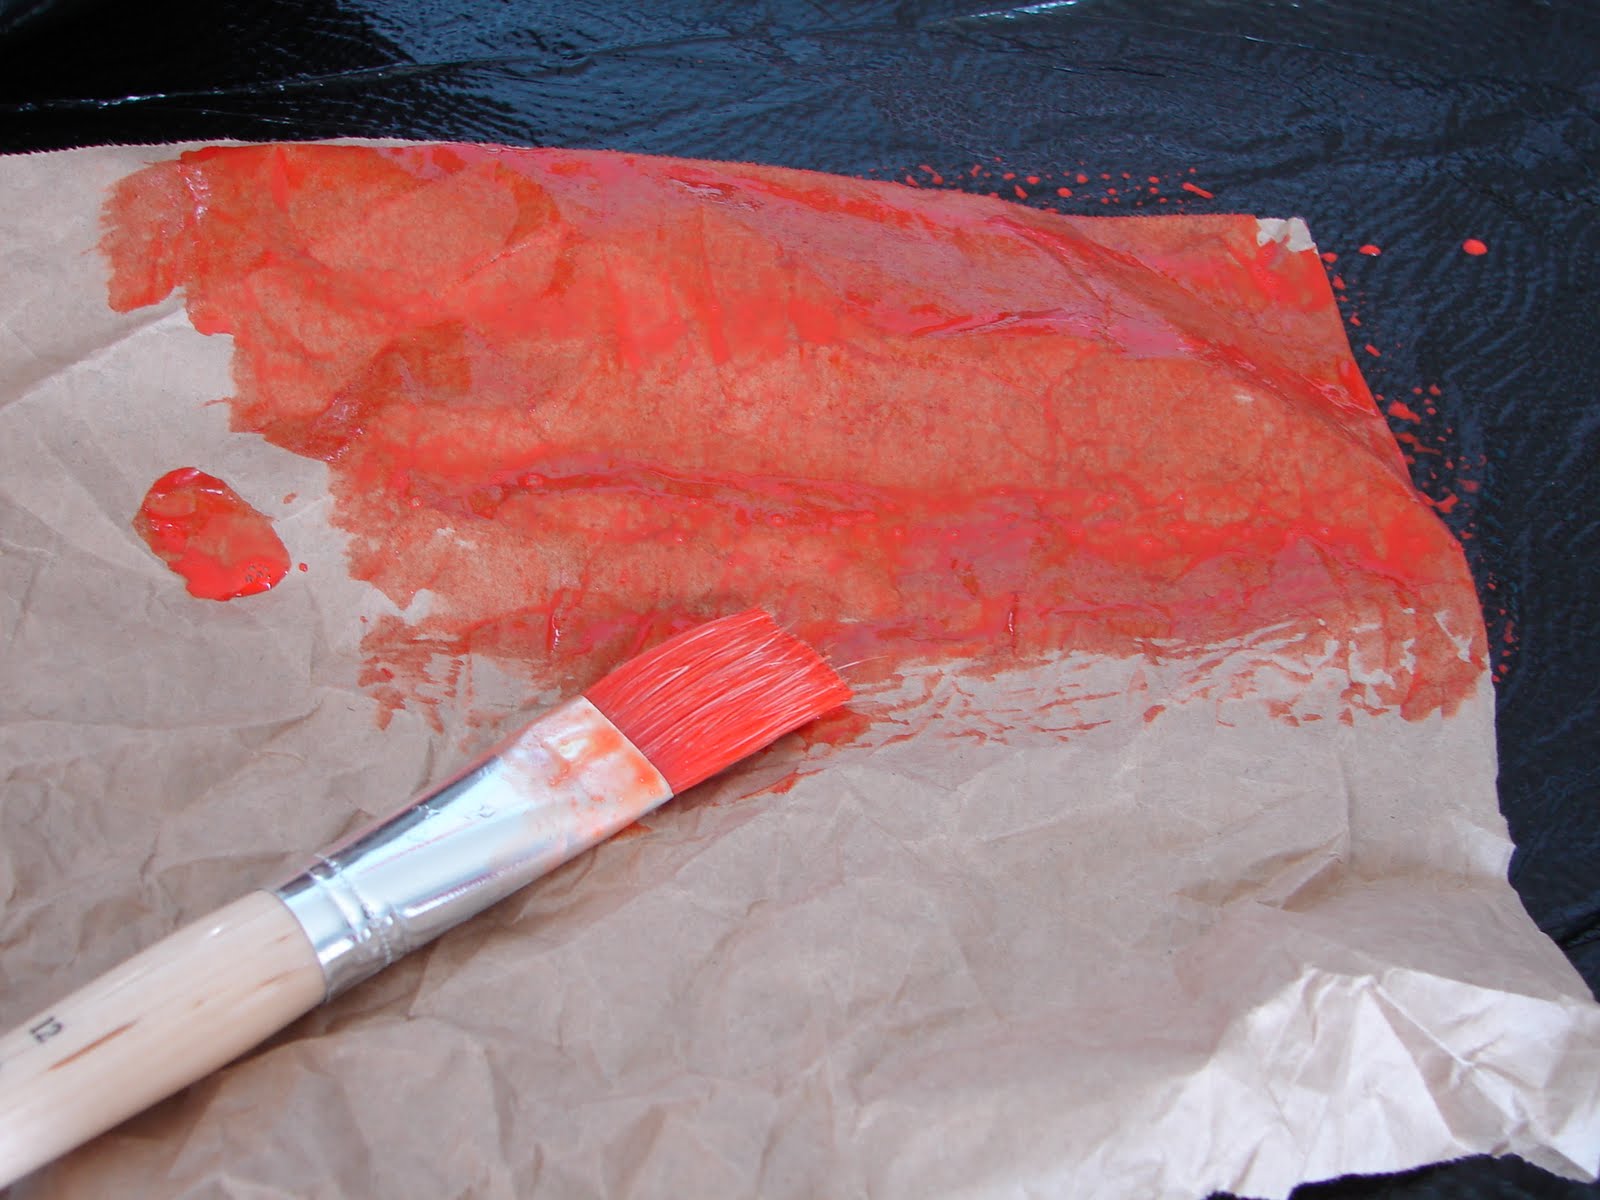
I crumpled the paper and let it dry awhile

Then I flattened it into a wrinkled mass with my iron to crease and dry it further.

After the paper is completely dry, gently open it up and press it flat to its full size again. Then to create a top and bottom border, cut from it two four inch wide pieces the width of the banner. Fold the top and bottom edges of one (not both) piece as if you were creating a hem. Press the "hem" flat and glue one edge to the top of the banner. You could just glue it on with the edges unfolded if you prefer.

To create a handle for hanging the banner, take two strips of kraft paper one foot long by one inch wide and twist them together except for one inch at each end. Glue the untwisted ends down to the back of the top edge of the banner.

On the other piece of border, fold one edge and leave the other. Cut into the border piece on the unfolded side to make a fringe. Then glue the folded edge onto the bottom of the banner.

Now that I have successfully made this sound forty times more complicated than it actually is, maybe you'll just go to the dollar store and pick up something. Either way, have fun!
Owl Beanie
I'm not usually a trend follower, but I finally gave in to the owlish cuteness. I made this owl beanie from the tutorial by Emily at Toad's Treasures, featured here at How Does She? Now if it only weren't 86 degrees outside, my daughter might actually have a chance to wear it!
Differing from the tutorial, I made this out of a light fleece and clipped the eye circles into lashes to give the owl a feminine touch. The dark color is actually purple although the crummy photo doesn't really show it.


She says she likes it, but wouldn't give me a smile til I had her pose with her kitty (who promptly squirmed out of camera range, but at least I caught a little bit of a smile).
Now she says she wants a pink owl softie. I made a brown one last week from Toad's Treasures tutorial...
 but now that she's seen the girly version of the owl concept, brown is out. Oh well, back to the sewing table! Although I think after 3 owly projects, I'm ready for the next thing. Anybody know what the next theme trend will be? I'm voting for jellyfish.
Differing from the tutorial, I made this out of a light fleece and clipped the eye circles into lashes to give the owl a feminine touch. The dark color is actually purple although the crummy photo doesn't really show it.


She says she likes it, but wouldn't give me a smile til I had her pose with her kitty (who promptly squirmed out of camera range, but at least I caught a little bit of a smile).
Now she says she wants a pink owl softie. I made a brown one last week from Toad's Treasures tutorial...
 but now that she's seen the girly version of the owl concept, brown is out. Oh well, back to the sewing table! Although I think after 3 owly projects, I'm ready for the next thing. Anybody know what the next theme trend will be? I'm voting for jellyfish.
Healing the Gut
I've known for a while now that my gut is not a happy place. If anyone is a candidate for gut problems, it's me. My history tells the story: wasn't breast fed as a baby, was on antibiotics many times during childhood for respiratory infections along with corticosteroids for asthma, more antibiotics thru my teen years, even more antibiotics in my twenties for kidney infections and UTI's right up into my thirties, a couple of run-ins with pneumonia and one bacterial stomach infection as an adult meant even more antibiotics... I don't think my digestive system has ever had a chance to develop normal flora. And as I get older, the effects are getting more and more pronounced.
I think the last straw(s) came when in a period of five years I had two pregnancies and two major surgeries. I haven't felt well since then. I had a bout of gallbladder pain after my last pregnancy, but an ultrasound showed no stones and the doc had nothing further to offer. Then the pain started to move down lower, across my abdomen. By this summer, I was in pain every single time I ate. I had no energy, brain fog 22 hours out of the day, felt weak and dizzy, forgot things constantly and just generally felt like crap. I looked into each of my symptoms and every time, the search ended at gut health. Time to do something about it. I'd heard of diets to help heal the gut and began reading up on them. Finding information about the GAPS diet, it seemed like just what I needed.
GAPS stands for Gut and Psychology Syndrome. The diet, based on the Specific Carbohydrate Diet but with more structure, is promoted by its creator Dr. Natasha Campbell-McBride and described in her book of the same name. She is a neurologist who developed this diet to help solve neurological problems that she determined in her research to stem directly from unhealthy gut flora & function. She used the protocol to help her autistic son. Her son is no longer autistic after she implemented the diet with him.
I have decided to give it a try - if it can heal the gut so completely as to repair neurological function, it's a powerful tool.
But I'm a wimp, and I don't really like the idea of going cold turkey on multiple foods at once so I decided, with the help of the information at the yahoo GAPShelp list, to sort of go into the diet backwards by eliminating foods gradually while adding GAPS foods slowly till I am in full GAPS. (I will wait til dd is weaned before doing the intro). The first thing I did was start having bone broth for breakfast every morning. The second thing I did was to go gluten-free. I never really thought I had any problem with wheat, but it seems like one of the eliminations that has the biggest learning curve so I wanted to start now to give me lots of practice learning how to make GF meals before I have to also eliminate other foods.

I have been wheat free (except maybe a few nibbles, so really not truly GF) for one week. I am absolutely shocked at the change I have experienced. My brain fog is gone. My mind often felt like a radio tuned to nothing but static, now it feels like the station is coming in clearly! I can't really describe it well other than to say that the mental discomfort I often lived with has been giving way to a smooth, calm, steady feeling. I don't know if this means I am gluten intolerant. It could be that once my gut heals, I may be able to introduce wheat back in if the symptoms were simply a result of the dysbiosis. Or not. We'll see - but I do know that if going GF forever is what it takes to feel this much better, I 'm in!
I think the last straw(s) came when in a period of five years I had two pregnancies and two major surgeries. I haven't felt well since then. I had a bout of gallbladder pain after my last pregnancy, but an ultrasound showed no stones and the doc had nothing further to offer. Then the pain started to move down lower, across my abdomen. By this summer, I was in pain every single time I ate. I had no energy, brain fog 22 hours out of the day, felt weak and dizzy, forgot things constantly and just generally felt like crap. I looked into each of my symptoms and every time, the search ended at gut health. Time to do something about it. I'd heard of diets to help heal the gut and began reading up on them. Finding information about the GAPS diet, it seemed like just what I needed.
GAPS stands for Gut and Psychology Syndrome. The diet, based on the Specific Carbohydrate Diet but with more structure, is promoted by its creator Dr. Natasha Campbell-McBride and described in her book of the same name. She is a neurologist who developed this diet to help solve neurological problems that she determined in her research to stem directly from unhealthy gut flora & function. She used the protocol to help her autistic son. Her son is no longer autistic after she implemented the diet with him.
I have decided to give it a try - if it can heal the gut so completely as to repair neurological function, it's a powerful tool.
But I'm a wimp, and I don't really like the idea of going cold turkey on multiple foods at once so I decided, with the help of the information at the yahoo GAPShelp list, to sort of go into the diet backwards by eliminating foods gradually while adding GAPS foods slowly till I am in full GAPS. (I will wait til dd is weaned before doing the intro). The first thing I did was start having bone broth for breakfast every morning. The second thing I did was to go gluten-free. I never really thought I had any problem with wheat, but it seems like one of the eliminations that has the biggest learning curve so I wanted to start now to give me lots of practice learning how to make GF meals before I have to also eliminate other foods.

I have been wheat free (except maybe a few nibbles, so really not truly GF) for one week. I am absolutely shocked at the change I have experienced. My brain fog is gone. My mind often felt like a radio tuned to nothing but static, now it feels like the station is coming in clearly! I can't really describe it well other than to say that the mental discomfort I often lived with has been giving way to a smooth, calm, steady feeling. I don't know if this means I am gluten intolerant. It could be that once my gut heals, I may be able to introduce wheat back in if the symptoms were simply a result of the dysbiosis. Or not. We'll see - but I do know that if going GF forever is what it takes to feel this much better, I 'm in!
Oatmeal Crispy Cakes
They're not pancakes, and they aren't a porridge, I think they are better than either one! This morning during our getting-ready-for-school chaos, I pulled the cooked oatmeal out of the fridge thinking to heat up an easy breakfast for the little ones. I normally will make a large batch on Sunday, and keep it refrigerated for a quick meal. Today I felt like something different so as I stuck a spoon into the thickened creamy oat goodness, I knew what I wanted to do with it - something I'd never tried, and boy is that a risky thing on a school morning when we have only so much time and a breakfast rejection could ruin the morning schedule... but I took the chance, and glad I did! I scooped out a ball of oatmeal, dipped it into flour and gently pressed it into a patty. Yes, this would work! So I used the last 1/4 cup of flour I had to finish making the rest of the oatmeal into patties. Sorry, sourdough starter, you will have to eat tomorrow.

Oatmeal Crispy Cakes
2c. cooked cooled oatmeal (cooked with milk is best, don't forget the vanilla!)
1/4c. flour, any type would work
1/4c. coconut oil
Preheat a cast iron skillet with the coconut oil on med. high to high heat (will depend on your pan & range, you want it at the point just before it smokes)
Scoop out a walnut sized ball of oatmeal, roll it around in the flour and press into a patty. Repeat with the rest of the oatmeal. Place the patties in the hot pan and cook til deep golden brown on the bottom, then flip and brown the other side.
Serve with your choice of topping - we used maple syrup. If you make the patties thick, you will have soft porridge in the middle, if you make them thin you will have much less porridge and most of the patty will be crispy (the best part, we think).

Oatmeal Crispy Cakes
2c. cooked cooled oatmeal (cooked with milk is best, don't forget the vanilla!)
1/4c. flour, any type would work
1/4c. coconut oil
Preheat a cast iron skillet with the coconut oil on med. high to high heat (will depend on your pan & range, you want it at the point just before it smokes)
Scoop out a walnut sized ball of oatmeal, roll it around in the flour and press into a patty. Repeat with the rest of the oatmeal. Place the patties in the hot pan and cook til deep golden brown on the bottom, then flip and brown the other side.
Serve with your choice of topping - we used maple syrup. If you make the patties thick, you will have soft porridge in the middle, if you make them thin you will have much less porridge and most of the patty will be crispy (the best part, we think).
Sprouted Wheat Salad: Version 2
This stuff is addictive! I am loving that I can make a hearty, nutritious side dish that we can eat cold. The summer heat makes eating a hot meal rather unappealing. Yesterday afternoon it got up to 88F in our house so we needed something cool and fresh.
This version of the sprouted wheat salad takes advantage of the tomatoes and corn coming out of the garden right now. We had a couple of ears of leftover corn on the cob the other evening, so I teamed them up with our tomatoes and made this sort of Mexican style salad. I intended to add a touch of the adobo sauce from a can of chipotles, but forgot. Next time, I guess! If you need to, you could use any other kind of bean, and I am sure canned or frozen corn would be just fine.
Sorry no pic of this one, it was hectic in the kitchen at the time between making this, a huge pot of ham & beans and chicken liver pate (with bacon and sauted mushrooms and caramelized onion...) and we ended up eating before I had a chance to grab the camera. Oh well, just imagine ripe sweet tomatoes and crisp corn on the cob, ok?
2 c. sprouted wheat, cooked and cooled
1 c. fresh corn, cut from the cob
1c. cooked black beans
1/2 c. minced cilantro
2 med. tomatoes, chopped
(optional) a quarter of a red onion, minced or, 1/4 c. minced chives
1 ripe avocado
Heat a cast iron skillet to almost smoking, with a touch of oil, and toss in the fresh corn. Allow the kernels to get a nice brown toasty spot, stir them around so they all get toasted.
Mix the wheat, beans, corn, tomatoes and cilantro together in a bowl. Add onion if desired. Place the bowl in the refrigerator and
make the dressing:
In a blender, place 1tsp. cumin seed or ground cumin, 1tsp oregano, 1/2 tsp. lime zest. If using cumin seed, blend these three ingredients to pulverize the cumin. Add 1/4c. cilantro, 8oz olive oil and 4oz apple cider vinegar. Blend thoroughly and taste, adjust seasonings as desired.
When ready to serve, dice the avocado and place into bowl with other ingredients. Dress the salad to taste. Serves 4-6.
This version of the sprouted wheat salad takes advantage of the tomatoes and corn coming out of the garden right now. We had a couple of ears of leftover corn on the cob the other evening, so I teamed them up with our tomatoes and made this sort of Mexican style salad. I intended to add a touch of the adobo sauce from a can of chipotles, but forgot. Next time, I guess! If you need to, you could use any other kind of bean, and I am sure canned or frozen corn would be just fine.
Sorry no pic of this one, it was hectic in the kitchen at the time between making this, a huge pot of ham & beans and chicken liver pate (with bacon and sauted mushrooms and caramelized onion...) and we ended up eating before I had a chance to grab the camera. Oh well, just imagine ripe sweet tomatoes and crisp corn on the cob, ok?
2 c. sprouted wheat, cooked and cooled
1 c. fresh corn, cut from the cob
1c. cooked black beans
1/2 c. minced cilantro
2 med. tomatoes, chopped
(optional) a quarter of a red onion, minced or, 1/4 c. minced chives
1 ripe avocado
Heat a cast iron skillet to almost smoking, with a touch of oil, and toss in the fresh corn. Allow the kernels to get a nice brown toasty spot, stir them around so they all get toasted.
Mix the wheat, beans, corn, tomatoes and cilantro together in a bowl. Add onion if desired. Place the bowl in the refrigerator and
make the dressing:
In a blender, place 1tsp. cumin seed or ground cumin, 1tsp oregano, 1/2 tsp. lime zest. If using cumin seed, blend these three ingredients to pulverize the cumin. Add 1/4c. cilantro, 8oz olive oil and 4oz apple cider vinegar. Blend thoroughly and taste, adjust seasonings as desired.
When ready to serve, dice the avocado and place into bowl with other ingredients. Dress the salad to taste. Serves 4-6.
Better Biscuits
I'm munching on a unique biscuit in between typing sentences - a wholegrain biscuit that is actually light and fluffy! I've tried subbing whole grain flour for all-purpose in my basic recipe before but have always been disappointed with the heavier texture and slightly bitter flavor. I solved the flavor problem by getting a grain mill and using fresh-ground flour instead of stale store-bought, but the texture was still an issue. Until today!
I decided to take Gnowfglin's Sourdough Ecourse and so I have just begun using my sourdough starter. Today I had increased my starter more than I ended up using for pancakes, so on a whim I decided to try biscuits. I had a recipe on my harddrive that I adapted a bit, and here are the results -
 Quite light for a whole grain biscuit, I'm very pleased. You can see by the color they are whole grain, and the flavor is as robust. I used a blend of half and half hard and soft white wheat. I don't care for the stronger flavor of the more common red hard wheat. I sometimes use spelt as it is a milder, nutty flavor that I really like. I baked these in a cast iron skillet that I placed in the oven before preheating it. I baked them at 475F, a very hot oven, because I've found that with quick breads, a higher temp gives a better oven spring so the final product rises higher & fluffier. Yum!
I am so excited that finally I have a successful sourdough starter going, and that I have a way to make biscuits with my fresh whole grain flour that doesn't result in hockey pucks!!
I decided to take Gnowfglin's Sourdough Ecourse and so I have just begun using my sourdough starter. Today I had increased my starter more than I ended up using for pancakes, so on a whim I decided to try biscuits. I had a recipe on my harddrive that I adapted a bit, and here are the results -
 Quite light for a whole grain biscuit, I'm very pleased. You can see by the color they are whole grain, and the flavor is as robust. I used a blend of half and half hard and soft white wheat. I don't care for the stronger flavor of the more common red hard wheat. I sometimes use spelt as it is a milder, nutty flavor that I really like. I baked these in a cast iron skillet that I placed in the oven before preheating it. I baked them at 475F, a very hot oven, because I've found that with quick breads, a higher temp gives a better oven spring so the final product rises higher & fluffier. Yum!
I am so excited that finally I have a successful sourdough starter going, and that I have a way to make biscuits with my fresh whole grain flour that doesn't result in hockey pucks!!
Bean Bag Bonanza

Somehow, back at the beginning of the school year, I received the assignment to create a classroom's worth of beanbags for my son's Waldorf school. I guess cuz I admitted to owning a sewing machine? Oh well. Down to business, very... repetitive... business.
Step One: a)Buy fabric on sale for half price at JoAnne's which results in b) end up paying more for thread than for the fabric.
Step Two: Cut, cut, cut. Thank goodness for my rotary cutter. I promised it a new blade after this is done.
Step Three: Sew, and sew, and sew....
Step Four: Lentils!! Yep, the preferred filling for Waldorf beanbags is the humble lentil. Hm, makes me glad cooler weather is here so I can enjoy a big pot of lentils and ham hocks cooked in bone broth, with a side of gluten-free rosemary ciabatta slathered in pasture butter, while wearing corduroy... wait, scratch that last part.
Can you believe, I delivered the beanbags to the school, in an appropriate willow basket, and forgot to take a picture of them? All I have left are these three, which will go to my teen as a gift so that he can keep up on his juggling skills.

Elderberry Lemonade for a Summer Cold

For a summer cold, steamy hot cups of herbal teas just won't do. Spend the day sipping on this cool concoction full of vitamin C and elderberry, instead.
Elderberry Lemonade
1/4 c. dried elderberries
2 c. water
juice of two lemons
sweetener to taste
crushed ice
10 oz cold water
Make the elderberry decocotion: combine the 2 of water with the elderberries and bring to a boil, lower to a simmer for 30 minutes. Strain out the berries and set aside.
Into a 16oz glass, put the lemon juice and 1/4 c. of the elderberry decoction. Add 10oz of cold water and sweeten to taste, then add crushed ice. Sip throughout the day.
Sprouted Wheat Salad

A nice cool salad for a hot July day, this dish is excellent for potlucks. With sprouted grain for a nutrient upgrade, this is a dish that is richly flavorful, hearty and nourishing without seeming too heavy for summer.
Prepare the wheat berries:
2c. organic wheat berries
1tbs vinegar
6c. water
Place wheat in a large bowl with the vinegar and water, let soak overnight or longer. Rinse twice a day (put a splatter screen on top of the bowl and simply invert it over the sink, then refill). When you can see tiny little sprouts just starting to emerge from the grain, it is ready.
To cook, drain and give the wheat a final rinse. Cook as you would pasta, in a pot of water. Test for doneness and remove from heat before the grains burst open. Drain in a colander and rinse with cool water. Set aside to cool and prepare the rest of the ingredients. Wheat can also be separated into portions and frozen at this point for future use, or dehydrated and ground for sprouted flour.
Dressing:
2c. fresh basil leaves
½ c. your favorite basic olive oil & vinegar dressing (see Favorite Vinaigrette)
¼ c. minced fresh chives
¼ c. finely grated parmesan
2c. cherry tomatoes, halved
1 ripe avocado
In a blender, process half the dressing and all of basil leaves til smooth. Pour over the cooked cooled wheat , add remaining dressing, chives, parmesan and tomatoes to the bowl and mix. Refrigerate for 2hrs to blend flavors, taste and adjust seasonings as desired. Before serving, dice the avocado and sprinkle over the salad.
Optional: Add ½ c. of chopped pistachios, pine nuts or almonds just before serving
©2010 Mom's Neverending List
Nourishing Graham Crackers

Graham crackers are a childhood staple - but the ones in the blue box I loved as a kid are full of stuff I don't want my own kids eating! (well, except for those s'mores on our last camping trip, hehe.) I sought out healthier versions at the natural foods stores, but ouch - so expensive, and they didn't really taste the way we wanted a graham cracker to taste. So I came up with this recipe, adapted from one I found on the net. I converted it by subbing in wholesome ingredients and applied the soaking technique common to Traditional Foods grain preparation. It's easy to do, the dough is mixed one day and the baking done the next, or whenever you have time.
2c. whole grain flour, approx. ½ to 1/3 of it soft wheat aka pastry flour
½ c. pasture butter, or a combination of butter & coconut oil
½ - ¾ c. rapadura
1tsp. vanilla
1 ½ tsp baking powder
¼ tsp sea salt
¼ c. yogurt, mixed with 1/8 c. milk or filtered water
Cream together the butter & rapadura. Stir in vanilla. Mix the dry ingredients and stir in, alternating with yogurt. If needed you can add a bit more flour. The dough should come together in a slightly sticky ball. Cover and let sit overnight.
Chill the dough to cool it. If necessary you can keep it in the fridge a day or two. If you want to keep it longer, freeze it, and thaw before baking.
When ready to bake, preheat the oven to 350F. Divide the dough into three portions. Roll out to a 1/8’ thickness on parchment paper, all the way to the edges, trimming off the ragged edges and adding them to the next portion. Slide the parchment onto a cookie sheet and with a knife, score the dough into square or rectangle shapes. Poke holes all over with a fork... seven year olds are great at this task...

and bake about 10 - 12 min. til lightly golden on the edges. Repeat for the remaining dough. I usually get about four 1’x1’ squares of dough after rolling each one out on its own parchment, including using up the scraps trimmed off to make straight edges.

As soon as one sheet of crackers comes out of the oven, slide on another and continue baking. Cool baked crackers on a wire rack.
If the crackers are not completely crisp, then after the last batch comes out of the oven, put all the cooked crackers back onto the baking sheets and place them in the hot oven. Turn off the heat at that point, and let the crackers sit in the oven until they are cool.
Crackers that won’t be eaten within a couple of days will keep perfectly for a very long time in a quart size canning jar, with an oxygen absorber packet and the lid on tight.
Win a Bosch Mixer!
Since my old Black & Decker food processor just bit the dust, I'm scoping out applicances - and found that Deals To Meals is having a giveaway this month for a Bosh mixer. Do I need to list the reasons you'd want a Bosch? I didn't think so!
If you aren't familiar with Deals To Meals, they are a really cool site that does comparisons of grocery prices for you, so you can get the best prices as you work on your monthly grocery list or your food storage needs. Members have access to the information about all the deals and sales in their area that are better than Sam's Club or Costco prices. They also have meal plans to help you stay organized and use your food storage so you can be sure to "store what you eat, eat what you store".
To enter, just put their button on your blog or post an entry on your blog about them... if you have no blog, there are other ways too... follow the instructions given in their giveaway post.
Click here to see giveaway & enter!
If you aren't familiar with Deals To Meals, they are a really cool site that does comparisons of grocery prices for you, so you can get the best prices as you work on your monthly grocery list or your food storage needs. Members have access to the information about all the deals and sales in their area that are better than Sam's Club or Costco prices. They also have meal plans to help you stay organized and use your food storage so you can be sure to "store what you eat, eat what you store".
To enter, just put their button on your blog or post an entry on your blog about them... if you have no blog, there are other ways too... follow the instructions given in their giveaway post.
Click here to see giveaway & enter!
Subscribe to:
Posts (Atom)